Connecting MetaTrader 5 to ATAS
This guide explains how to configure and connect the MetaTrader 5 (MT5) platform to ATAS.
The list of brokers that can be connected to ATAS via MT5 includes: AMP, BCS, FXFlat, Just2Trade, AvaFutures, FP Markets, and Taurex.
Configuring MetaTrader 5
To use this connection, MetaTrader 5 must be running on your computer with an active trading account and connected market data.
Before connecting MT5 to ATAS, complete the following setup steps:
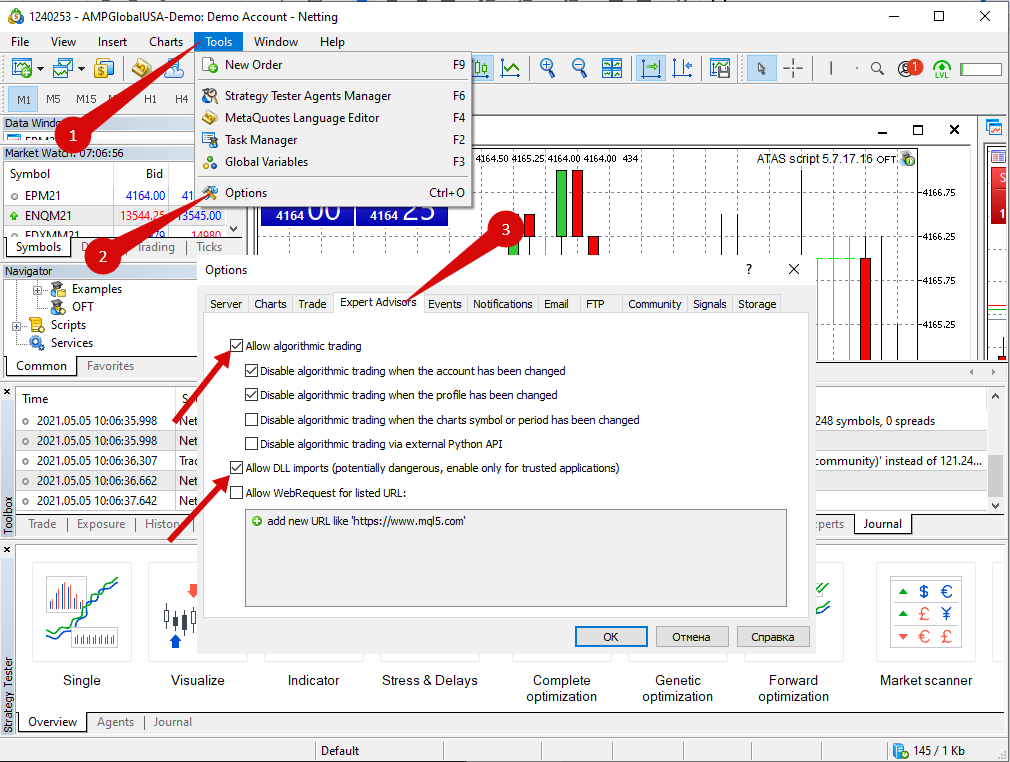
- In MetaTrader 5, open Tools → Options, go to the Expert Advisors tab, and enable:
- Allow automated trading
- Allow DLL imports
- Close the MT5 platform.
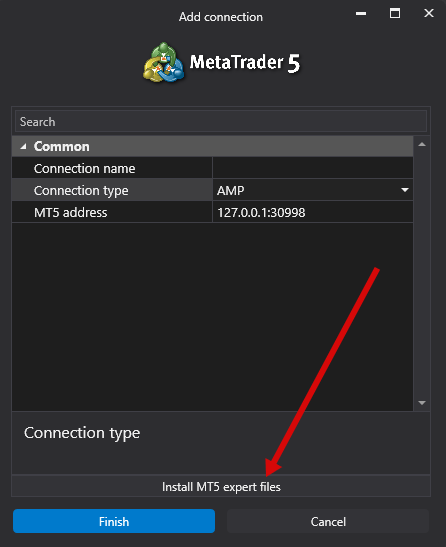
- Install the MT5 Expert Advisor files by clicking Install MT5 Expert Files in the ATAS MT5 connector.
After each ATAS update, reinstall the Expert Advisor files by clicking the "Install MT5 Expert Files" button in the MT5 connector.
- Open the Navigator window in MT5 and locate OFT under the Expert Advisorssection. Attach it to a chart by either:
- Right-clicking and selecting Attach to Chart, or
- Dragging it onto a chart.
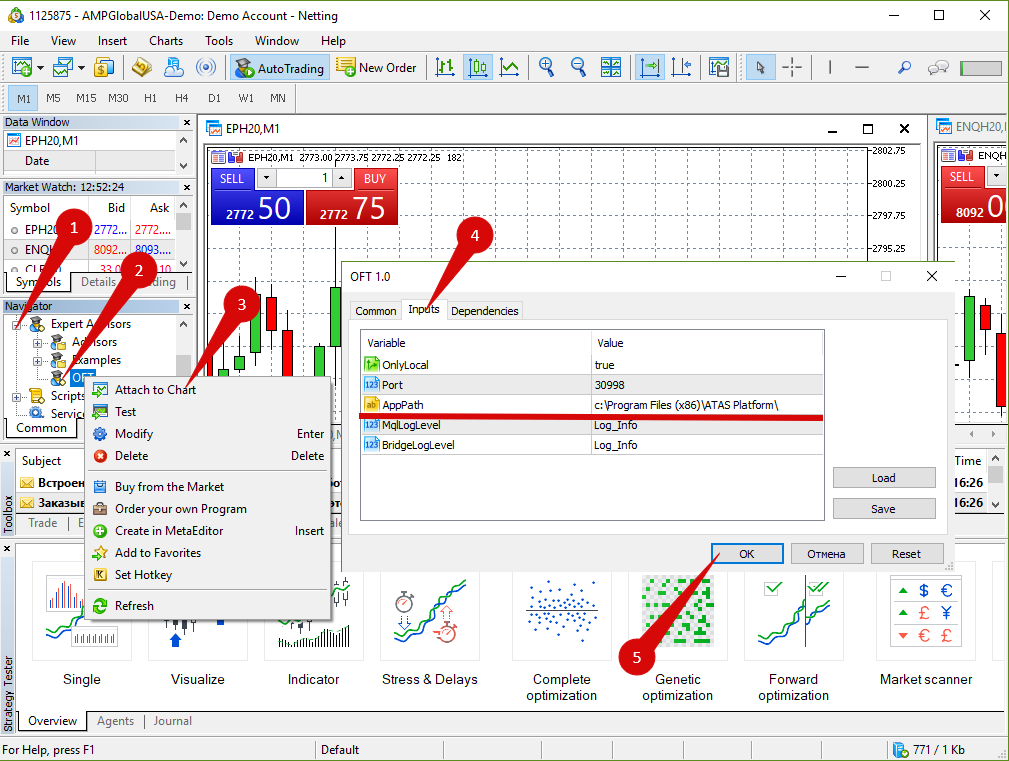
When adding the advisor, ensure that the AppPath parameter contains the correct path to your ATAS installation folder.
Make sure that Allow Automated Trading is enabled on the General tab.

Do not change the timeframe of the MT5 chart where the OFT advisor is attached. Otherwise, real-time data transmission to ATAS will stop.
Connecting an MT5 Account to ATAS
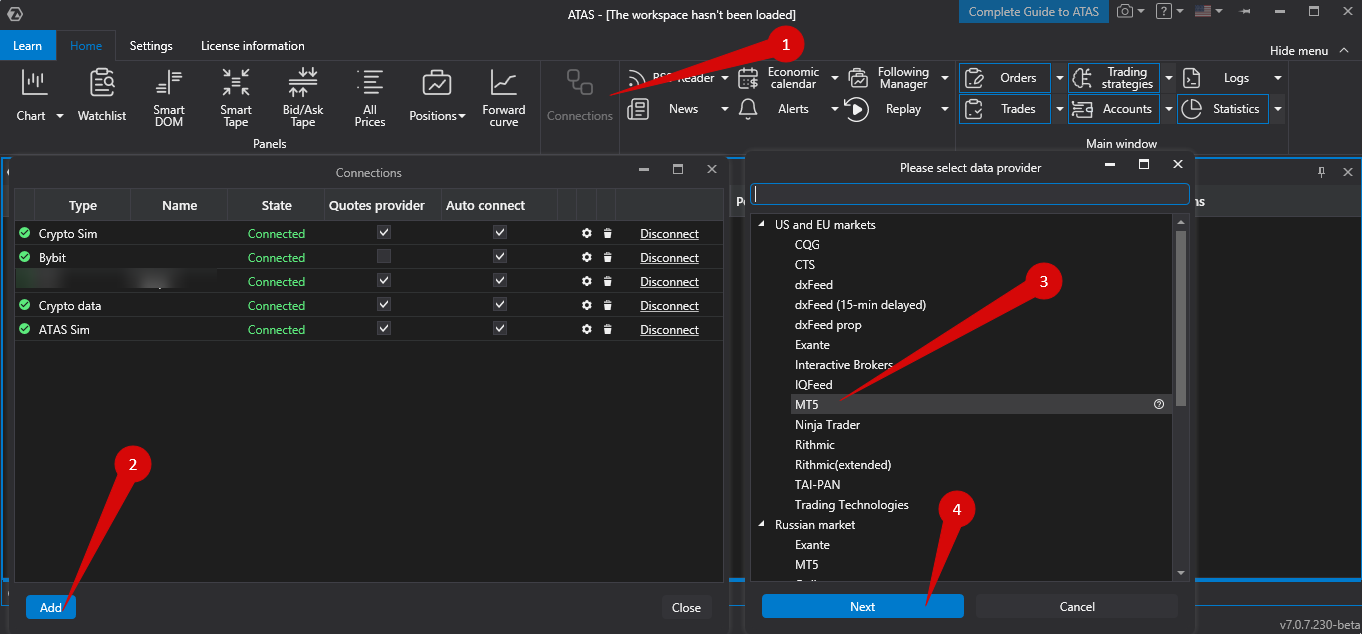
To create an MT5 connection in ATAS:
Connections → Add → MT5 → Next
The agreement confirmation windows will then appear:
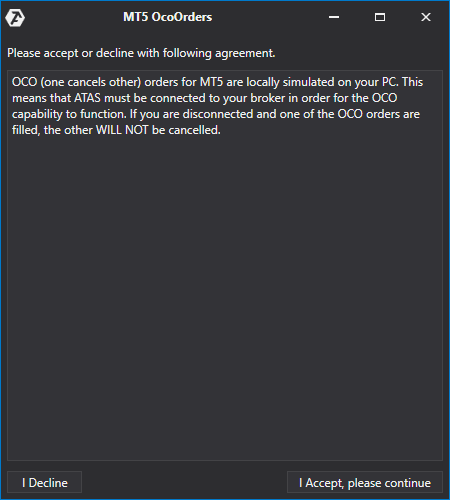
OCO (One Cancels Other) orders are simulated locally on your computer when using an MT5 connection. The platform must remain connected to the broker for OCO orders to function correctly. If the connection is lost and one order in the OCO group is executed, the remaining orders will not be canceled automatically.
Connection Settings in ATAS

- Connection Type — select your broker.
- MT5 Address — local IP address used for communication with MT5 (default value is usually correct).
Important: When using a MetaTrader 5 connection, ATAS processes tick data according to the technical specifics of the MT5 data source to ensure correct trade aggregation.
ATAS does not request ticks from the current second. Instead, it requests tick data only for the fully completed previous second because ticks belonging to the same second may arrive from the MT5 server at different times.
Tick requests are sent approximately 200 milliseconds after the start of each new second. This delay ensures that all ticks from the previous second have been received before processing begins.
This approach helps:
- Maintain tick data integrity.
- Avoid missing trades.
- Build accurate clusters, delta calculations, and other volume-based analytics.
This behavior is a technical characteristic of MetaTrader 5 data processing and should not be considered an ATAS-side delay or malfunction.
After configuration, the MT5 connection will appear as a separate entry in the connections list.
Detailed information about connection parameters is available in the article: Connection Settings Window.
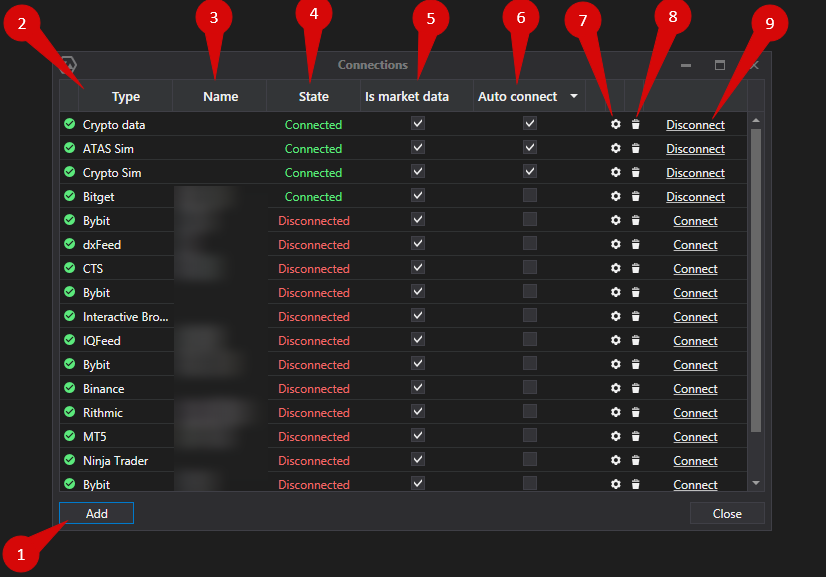
Connections Window Elements
| Item | Description |
| 1. Add | Create a new connection. |
| 2. Type | Connection source type. |
| 3. Name | Custom connection name. |
| 4. Status | Current connection status. |
| 5. Quote Provider | Select this connection as a market data source. |
| 6. Auto-Connect | Automatically connect when ATAS starts. |
| 7. Settings | Open connection settings. |
| 8. Remove | Delete the connection from the list. |
| 9. Connect / Disconnect | Manually connect or disconnect the connector. |
Was this article helpful?
That’s Great!
Thank you for your feedback
Sorry! We couldn't be helpful
Thank you for your feedback
Feedback sent
We appreciate your effort and will try to fix the article