To connect ATAS to Interactive Brokers, you need to make some changes in TWS settings. You must download and install the latest version.
To receive tick data, it is important to purchase a subscription.
Download and install the TWS trading terminal (latest version).
To receive online data in ATAS, your IB account has to provide tick-by-tick data via API.
IMPORTANT: Interactive Brokers doesn't provide trade direction — it is calculated by ATAS. Delta values may vary after chart refresh.
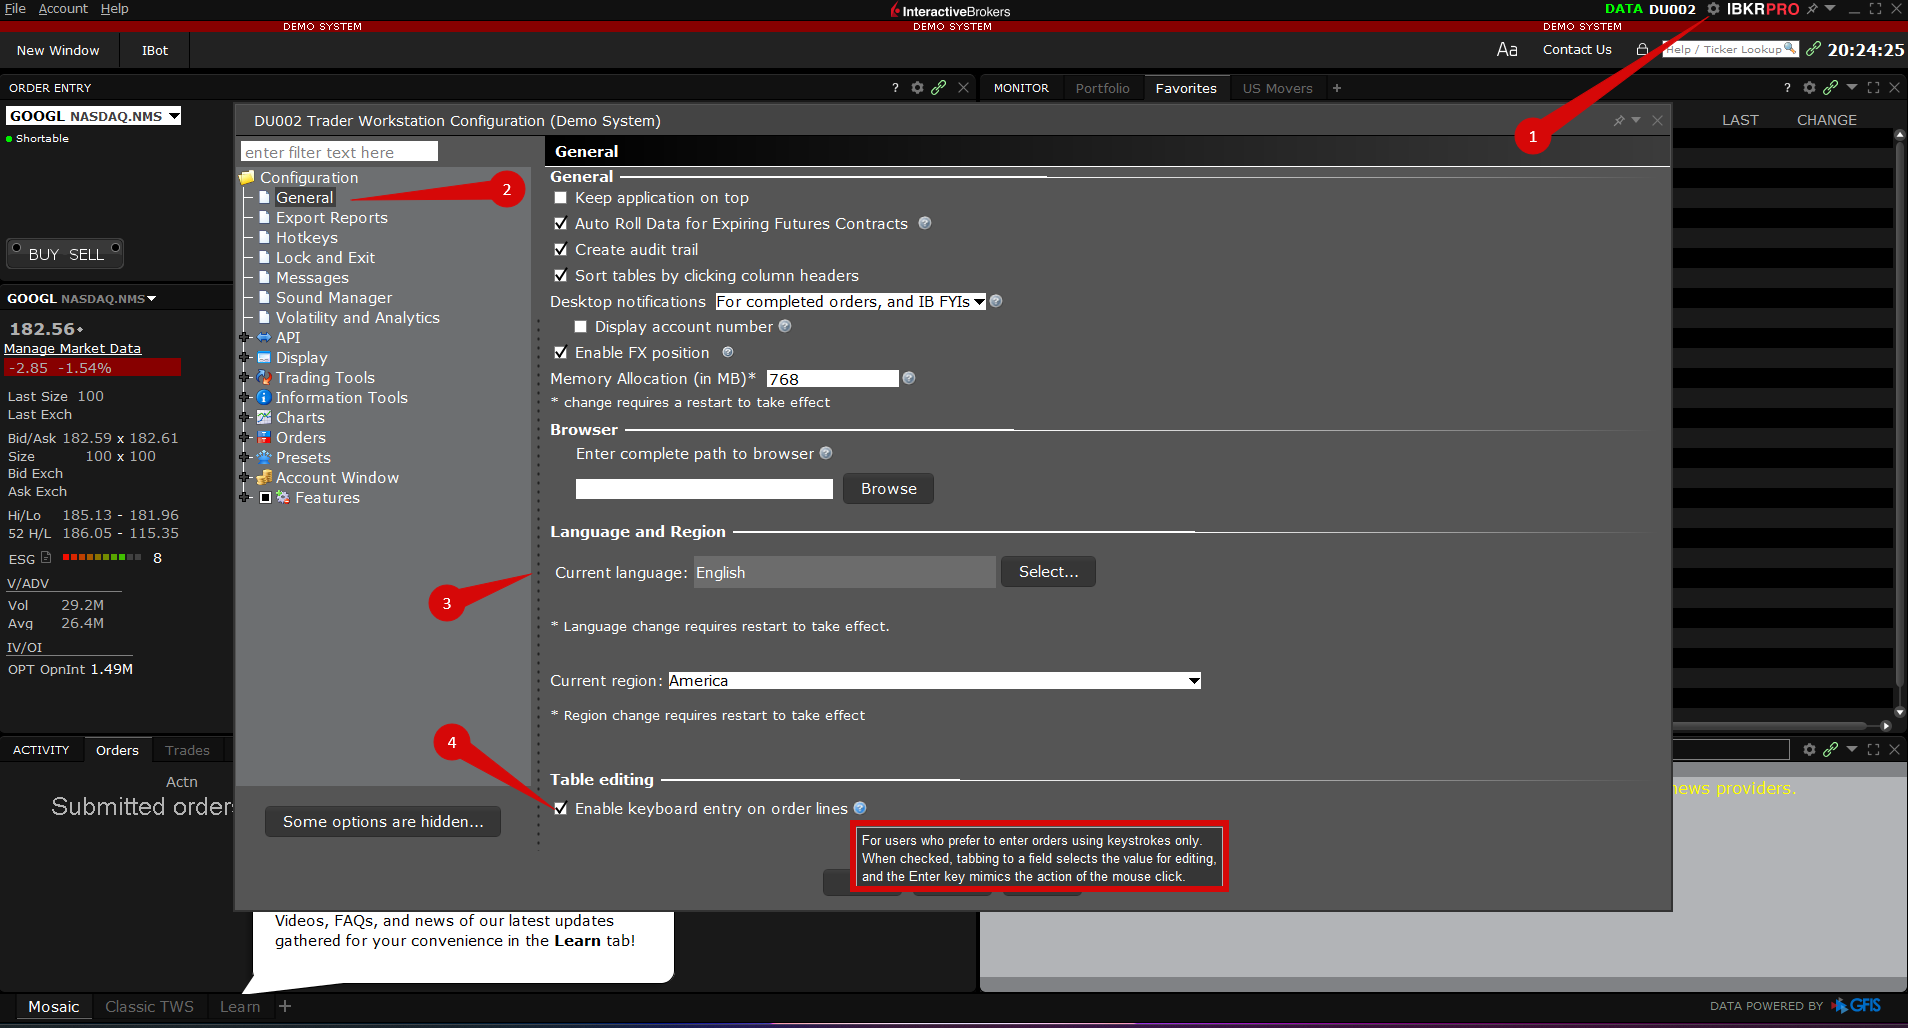
API Settings in TWS
Set the following in Configuration → API → Settings:

- Enable Activate ActiveX and socket clients.
- Disable API, read-only.
- Enable Load open orders on connection.
- Enable Send API notifications in English.
- If the port is in use, change Socket-Port to a free one.
NOTE: The demo account from Interactive Brokers doesn't provide online data for stocks.
Adding the Connection in ATAS
- Open ATAS and click Add to create a new connection.
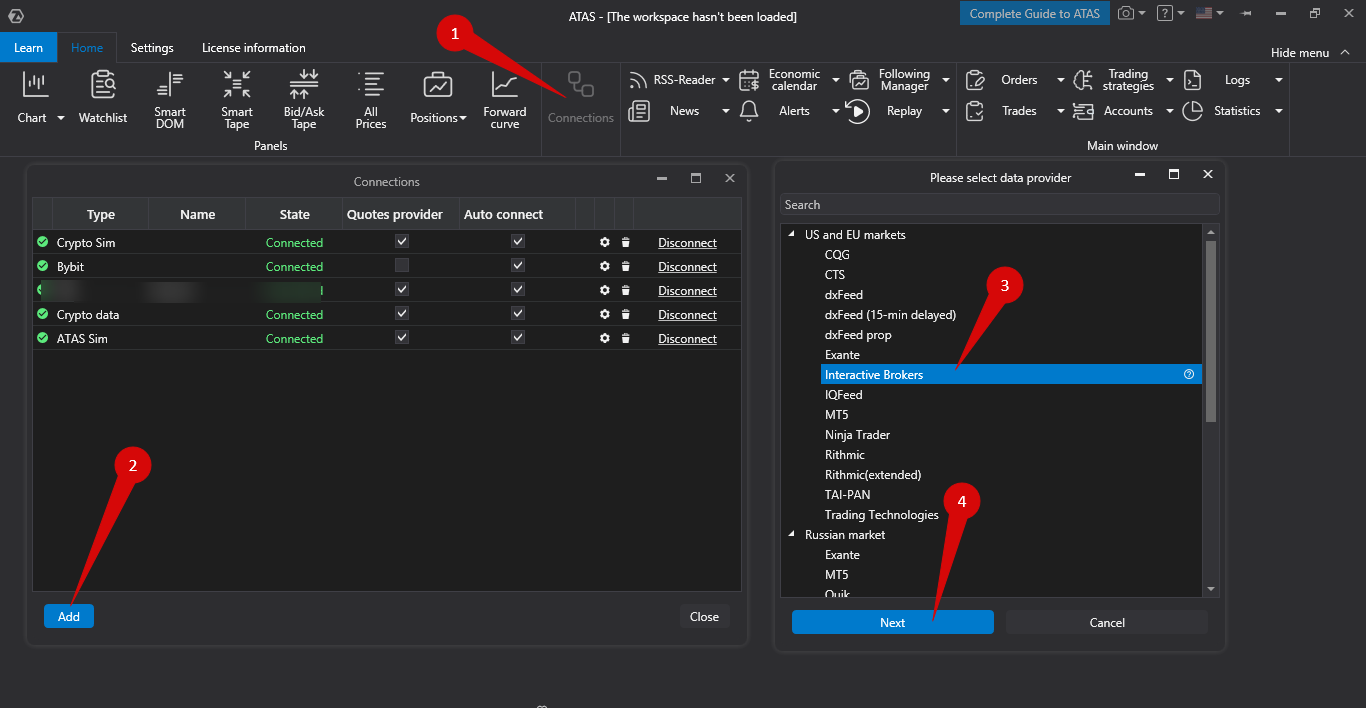
- Select Interactive Brokers as the connection type and click Next.
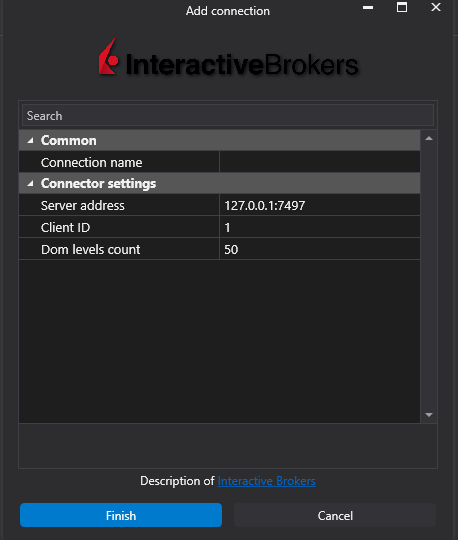
- Server address: IP and port of the computer running TWS. Default: 127.0.0.1:7497.
- Client ID: Any number greater than 0 (default: 1).
- DOM levels count: Market depth limit (default: 50).
NOTE: Interactive Brokers market data may differ significantly from other data providers due to the nature of this connection. Please take this into account when analyzing/trading using this broker's connection.
Click OK — the connection will be added.
The connection will appear as a separate row in the connections window. More information is available here: Connection settings window.

Connection Window Description
- Add – add a new connection.
- Type – connection source.
- Name – user-defined name.
- Status – connection status.
- Quote Provider – select this connection as a quote provider.
- Autoconnection – enable this option for automatic startup.
- Connection settings – button to configure the connection.
- Remove – delete the connection from the list.
- Connect/Disconnect – toggle the connector state.
Was this article helpful?
That’s Great!
Thank you for your feedback
Sorry! We couldn't be helpful
Thank you for your feedback
Feedback sent
We appreciate your effort and will try to fix the article