This instruction is used to connect a Quik trading account.
IMPORTANT: This connection is supported by QUIK terminal version 6.15 or later.
To set up the connection, follow the steps below:
1. Launch the QUIK trading terminal.
2. Open Time and sales/Table of anonymous transactions (in older versions, this is the Table of all transactions): if it is not already open
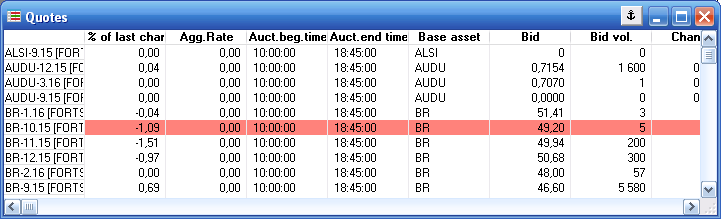
IMPORTANT: Add the instruments you need to the Time and Sales/Table of anonymous transactions (Table of all transactions) and make sure that the transactions are broadcast, otherwise online data will not be received in ATAS. If the transactions are not broadcast, contact your broker and ask to enable this data. Only one table of anonymous transactions should be open.
Time and Sales (in older versions, this is known as the All Trades
table):
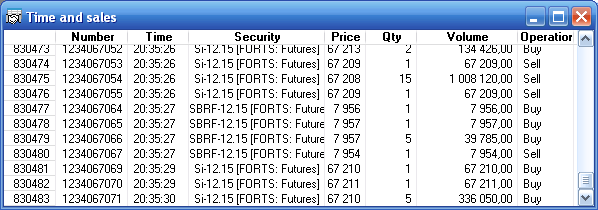
IMPORTANT: Add the instruments you need into the Time and Sales (All Trades) table and make sure that trades are broadcastotherwise, online data will not be fed to the ATAS. If trades are not broadcast, please contact your broker and ask it to enable these data.3. In the Services menu, select Lua scripts.

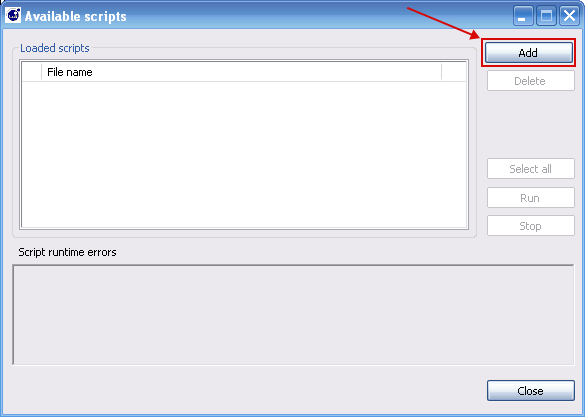
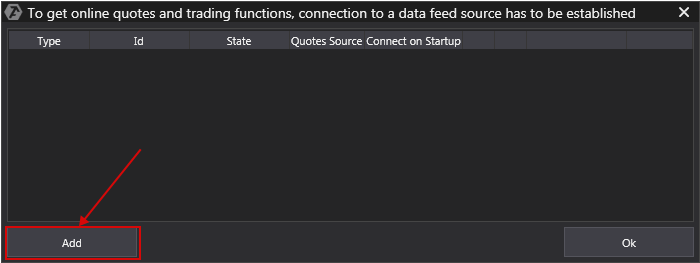
4.Then click the Add button in the window that opens:
5. Open the folder where the ATAS platform is installed.
6. Find the OFT.lua file in the folder (the default path to the file is C:\Program Files (x86)\ATAS Platform\OFT.Lua) and click on it twice with the left mouse button, after which this file will be displayed in the Available scripts window.
7. In the Quik program it is necessary to enable the processing of external transactions (go to the menu Trade->External Transactions. In newer versions Services->Export/Import Data->External Transactions. In the window that appears, you should click on the “Start processing” button and check the “Start processing of external transactions automatically” box)
8. Next, select this file and click Run, select Run in Lua 5.4.1. Wait for the script to finish running.
This completes the customization of Quick.

If you see this error when running the script, you need to install the following library on your computer: https://www.microsoft.com/ru-ru/download/details.aspx?id=52685.
Download and install both files.

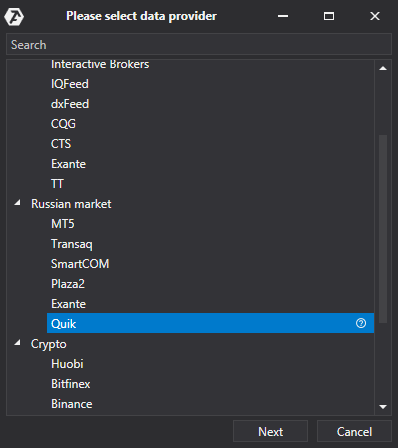
To set up a Quik connection to the ATAS platform, in the main platform window, click Connections - Add - Quik and click the Next button.
This will open a window with a list of available accounts and quotes sources:
Select the QUIK connection from the list and click the Next button.
This will open the agreement conclusion window:
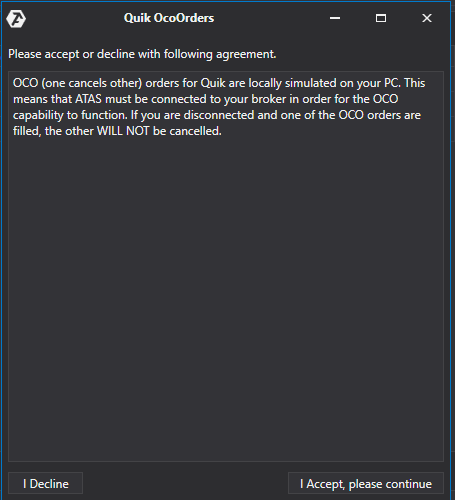
OCO (one cancels other) orders for the Quik connection are locally emulated on your computer. This means that the platform must be connected to your broker for OCO orders to function properly. If you are disconnected and an OCO order is filled, the other orders of the same group WILL NOT BE CANCELED!
If you agree, click “I Accept, Please continue”.
This will open the Quik connection windowfill out all the fields and click Next.
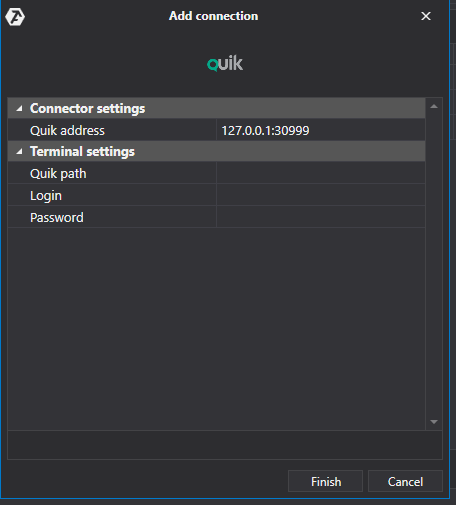
- In the connection window, enter your Quik Login and Password.
- In the Path field, specify the path to start the Quik program.
* The path to the demo version of Quik by default is c:\Program Files\QUIK-Junior\info.exe
- Processing of external transactions in Quik must be enabled (go to Trades ->External transactions). In the window that opens, click the “Start processing” button and check “Run external transaction processing automatically” box)
- Host: this field specifies the connection server address (IP and Port of the PC) where Quik is installed and runs. To connect to Quik (for a locally installed single account), do not change this parameter.
* Logging level - logging level selected by the user ! The choice of the level depends on the degree of technical detail of the information to the merchant server is displayed in the logs. 4 logging levels are available
- Debug
- Info
- Warning
- Error
If the login and the password parameters are set and a connection occurs with disabled Quik, ATAS will automatically launch Quik and perform authorization in it. These fields can be left blank if this is not necessary.
IMPORTANT: Removing and modification of applications in the ATAS platform is available only for those applications that were opened directly through the ATAS. Removal and modification of applications open through QUIK or other software is not supported.Configuration of the Second Quik Connection to ATAS
To create a second connection for Quik to ATAS, use another Quik session (download and install the new Quik to another folder if two Quik applications are to work on the same computer)
Next, perform the following steps:
1) Copy ATAS.lua to the ATAS installation folder and save it under a different name (for example: ATAS1.lua) (both files must be located in the same ATAS folder).
* the default file path is C:\Program Files (x86)\Advanced Time And Sales\ATAS.Lua
2) Open the second copied file (ATAS1.lua, in our example) in a Notepad.
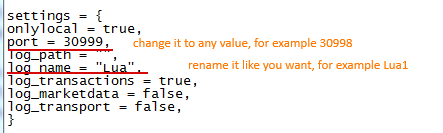
3) Locate the port and log_name settings and change them as needed (in our example: port = 30998, log_name =Lua1 )then, save the file.
Changing it according to your account restrictions, for example, if the broker allows you to set a stop for only 30 days, then the line will look like order_gtc_period = 30
The OFT.lua file is located in the folder where the platform is installed, by default it is C:\Program Files (x86)\ATAS Platform
4) Add a new Quik connection to ATAS as described above.
5) In the Host field of the Quik connection window on the ATAS platform, change the port to the value indicated for the port parameter (in our example, port = 30998) in the duplicate file (in our example: ATAS1.lua).
6) In the Path field, specify the path to the start of the second Quik program (navigate to the second Quik installation folder).
7) In the second Quik, add the duplicate Lua script file (in our example: ATAS1.lua) as described at the beginning of the instruction, and run it.
8) Connect to the created connection in ATASby clicking the Connect button.
* After the configuration is complete, the connection will appear in the list of connections as a separate row:
Why quotes in ATAS differ from quotes in Quik platform?
It is not correct to compare ATAS and Quik quotes on charts. ATAS platform receives quotes from the Table of anonymized trades. For comparison, open the Table of anonymized trades in Quik and the chart in ATAS.
If I put a risk manager on Quik, it can not somehow affect the work of ATAS?
It is necessary to see how this risk manager interacts with Quik, there should be no problems, but whether it will limit orders from ATAS is difficult to say. ATAS sends orders through LUA, and this manager can limit risks only through the program interface, in general it depends on the program of the risk manager.
Was this article helpful?
That’s Great!
Thank you for your feedback
Sorry! We couldn't be helpful
Thank you for your feedback
Feedback sent
We appreciate your effort and will try to fix the article