This instruction serves as a guide for connecting the Bybit exchange to the ATAS platform.
If you don’t have an account yet, register at: https://www.bybit.com/
Step 1. Set one-way position mode
To trade through ATAS, you must activate the one-way position mode. Hedging mode is not supported. You can change this mode in the chart settings on Bybit.
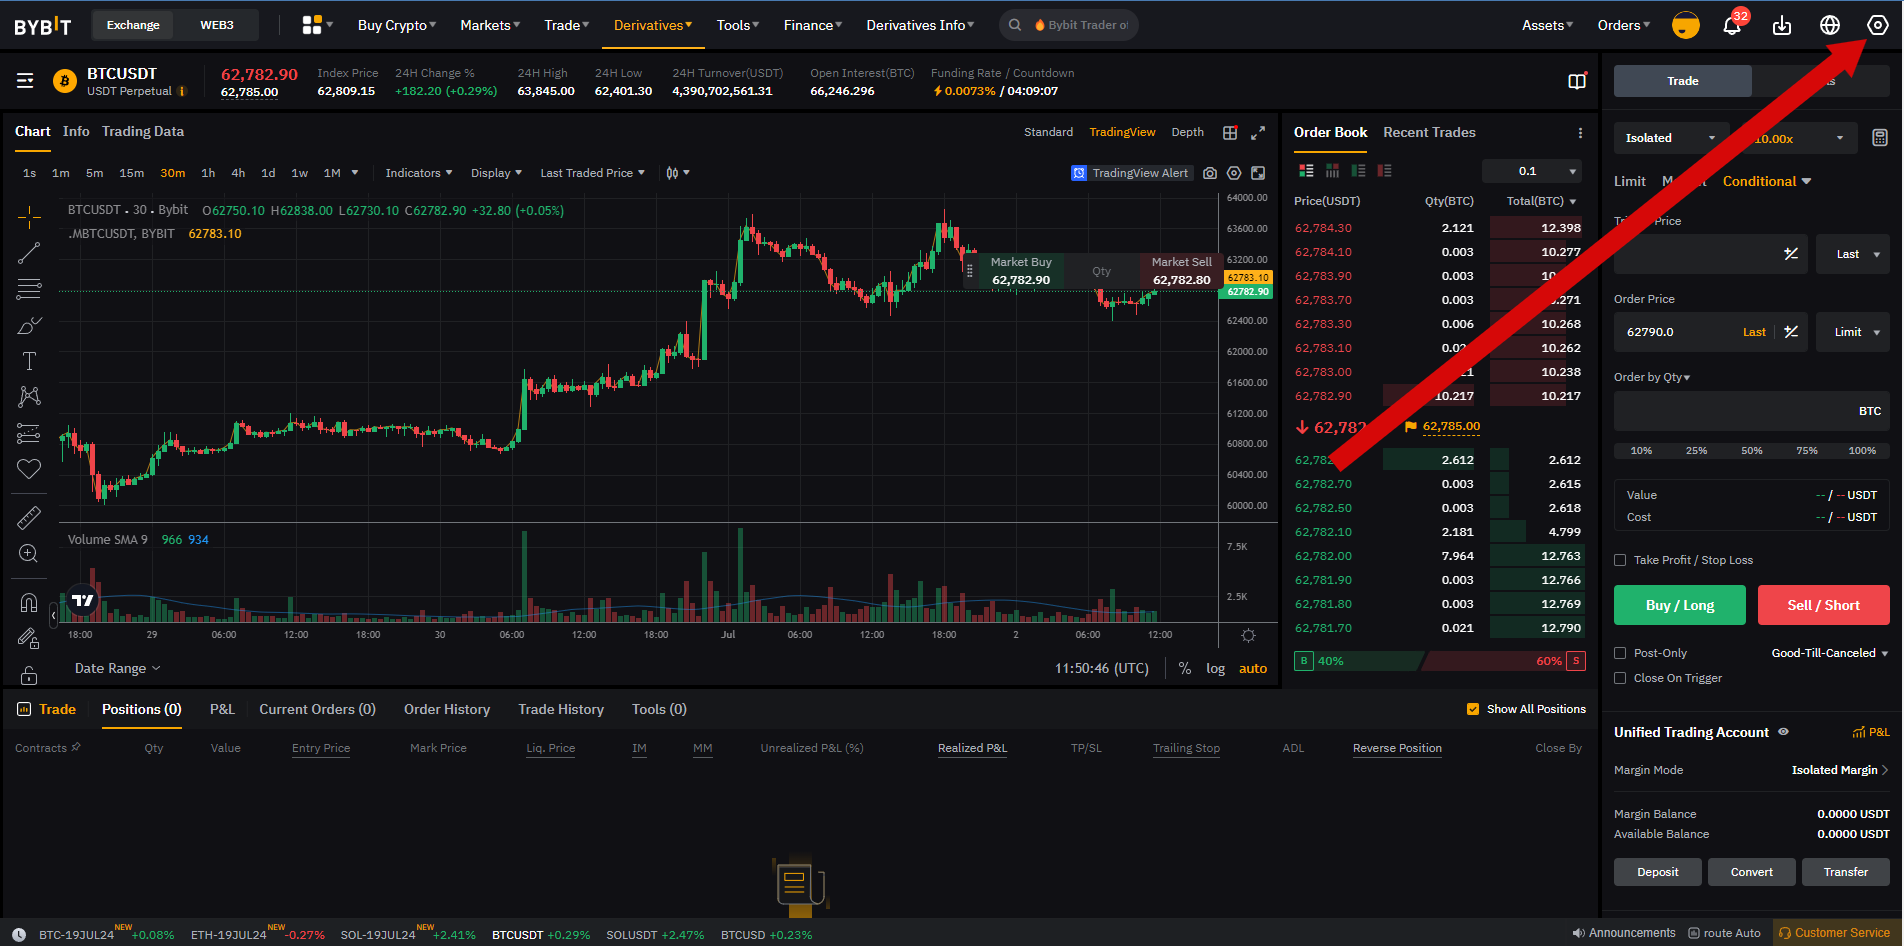

Step 2. Create an API key
1. Generate API key
Create it in your account at: https://www.bybit.com/app/user/api-management
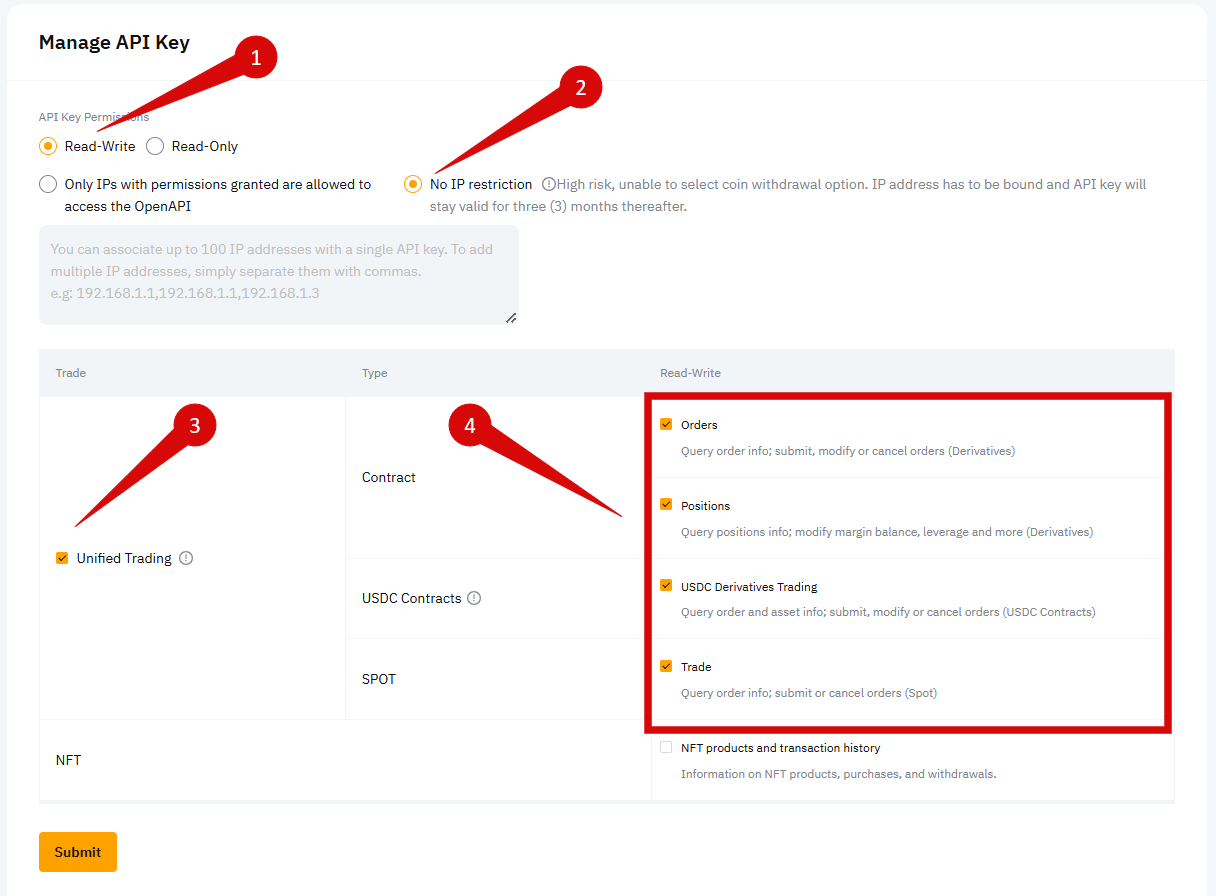
2. API settings and restrictions
Configure them properly to allow connection with ATAS:
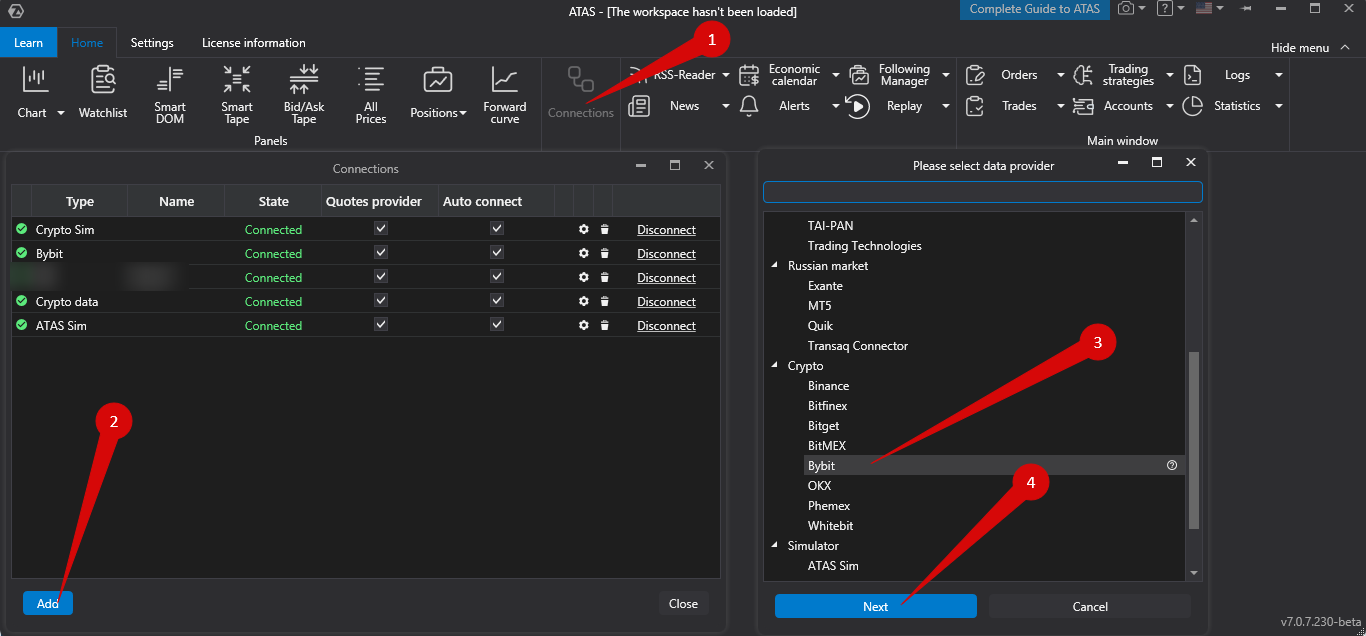
Step 3. Connect your account in ATAS
In the main window of ATAS, go to Connections → Add → Bybit, then click Next.
A window will open for agreement signing:
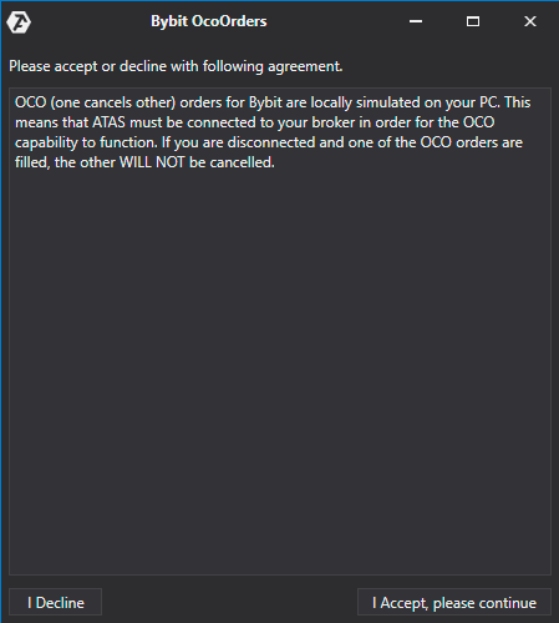
OCO (One Cancels Other) orders in ATAS are emulated locally on your computer. This means the platform must be connected to your broker for OCO orders to work. If disconnected and one OCO order is filled, others in the group WILL NOT be canceled!
Step 4. Configure the connection in ATAS
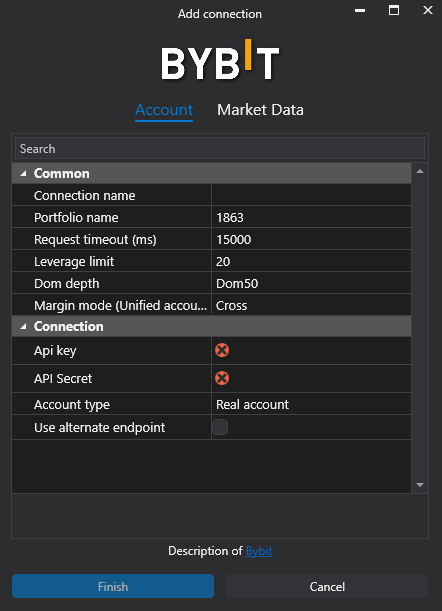
- API key, Secret key – paste the generated keys from Bybit.
- Use alternative endpoint – check to use api.bytick.com. Uncheck for api.bybit.com. Useful if api.bybit.com is blocked.
- Connection name – displayed in the list of connections.
- Portfolio name – optional identifier for multiple portfolios.
- Request timeout – max time to wait for data before error. Can be left by default.
- Limit leverage – maximum allowed leverage.
- DOM depth – depth of the order book.
- Margin mode (Unified account) – default margin setting.
Connection list window
Once set up, the connection will appear as a separate line in the list.
For more information, visit: Connection settings window
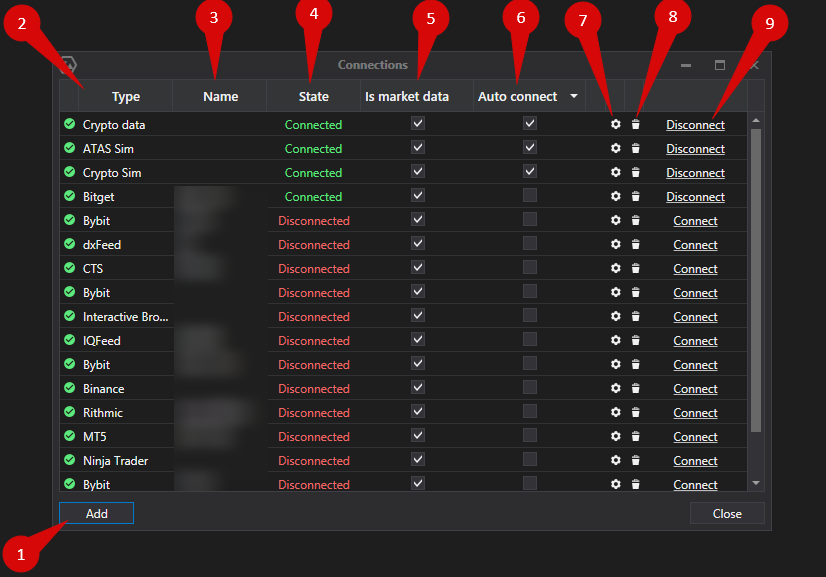
- Add – add a new connection.
- Type – connection source.
- Name – name you assign to the connection.
- Status – current connection status.
- Quote Provider – assign this connection as quote provider.
- Auto-Connect – enable auto-connection on platform launch.
- Connection settings button
- Remove connection button
- Connect/Disconnect – activate or deactivate the connection.
Was this article helpful?
That’s Great!
Thank you for your feedback
Sorry! We couldn't be helpful
Thank you for your feedback
Feedback sent
We appreciate your effort and will try to fix the article